
/e/OS emulator
Edit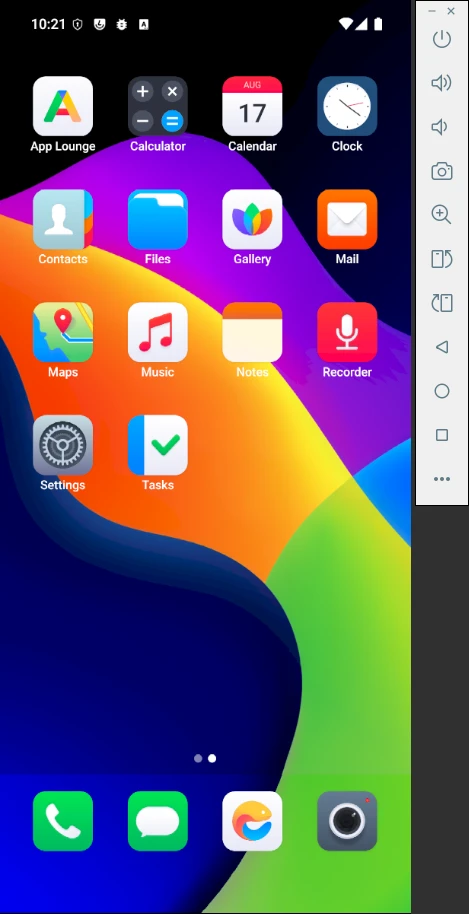
Install Java
The Android SDK command-line tools require Java. Install a Java runtime before
running sdkmanager or avdmanager.
On Ubuntu:
sudo apt install openjdk-17-jre-headless
On Fedora:
sudo dnf install java-17-openjdk
Verify that Java is available:
java -version
Install the Android SDK tools
This guide uses the Android SDK Command-Line Tools so that every command runs against the same SDK directory. Android Studio is not required.
Download the Linux command-line tools ZIP from the Android Studio download page,
then install it under cmdline-tools/latest in your Android SDK directory:
export ANDROID_HOME="${HOME}/Android/Sdk"
mkdir -p "${ANDROID_HOME}/cmdline-tools"
SDK_TOOLS_TMP="$(mktemp -d)"
unzip /path/to/commandlinetools-linux-….zip -d "${SDK_TOOLS_TMP}"
mv "${SDK_TOOLS_TMP}/cmdline-tools" "${ANDROID_HOME}/cmdline-tools/latest"
Add the SDK tools to your PATH:
export PATH="${ANDROID_HOME}/cmdline-tools/latest/bin:${ANDROID_HOME}/emulator:${ANDROID_HOME}/platform-tools:${PATH}"
Install Android Emulator and Platform-Tools into the same SDK directory:
sdkmanager --sdk_root="${ANDROID_HOME}" --install "emulator" "platform-tools"
Accept the Android SDK license prompts if sdkmanager asks for confirmation.
Verify that the required commands are available:
command -v sdkmanager avdmanager emulator adb
java -version
emulator -accel-check
Download and verify the image
Download an emulator image and its .sha256sum file from the
/e/OS image server, or
build an image with IS_EMULATOR=true.
Keep the ZIP archive and checksum file in a temporary download directory. The archive will be extracted into your Android SDK in the next step.
Verify the archive from the directory where you downloaded it:
sha256sum --check IMG-e-….zip.sha256sum
The checksum detects a damaged download. Because the checksum and archive are provided by the same server, this check does not establish the publisher’s identity.
Still from the download directory, inspect the source.properties file stored
inside the ZIP before extracting it:
unzip -p IMG-e-….zip '*/source.properties'
This command prints the metadata file without unpacking the archive. The
*/source.properties pattern matches the metadata file inside the ABI
directory contained in the ZIP. Use the reported values to choose the install
path in the next step. For example, an Android 16 x86_64 image reports API
level 36, tag lineage, and ABI x86_64.
Install the system image
Extract the image from your download directory into the Android SDK system-image
tree. The destination is inside ANDROID_HOME, not inside the temporary
download directory:
cd /path/to/downloads
mkdir -p "${ANDROID_HOME}/system-images/android-36/lineage"
unzip IMG-e-….zip \
  -d "${ANDROID_HOME}/system-images/android-36/lineage"
The ZIP already contains the ABI directory. After extraction, the installed image must be writable by your user and have this layout:
${ANDROID_HOME}/system-images/android-36/lineage/x86_64/
Do not link directly to build output owned by root or another user.
Create the Android SDK package metadata file:
cat > "${ANDROID_HOME}/system-images/android-36/lineage/x86_64/package.xml" <<'EOF'
<?xml version="1.0" encoding="UTF-8" standalone="yes"?>
<ns2:repository xmlns:ns2="http://schemas.android.com/repository/android/common/02" xmlns:ns12="http://schemas.android.com/sdk/android/repo/sys-img2/03">
  <localPackage path="system-images;android-36;lineage;x86_64" obsolete="false">
    <type-details xmlns:xsi="http://www.w3.org/2001/XMLSchema-instance" xsi:type="ns12:sysImgDetailsType">
      <api-level>36</api-level>
      <base-extension>true</base-extension>
      <tag>
        <id>lineage</id>
        <display>LineageOS</display>
      </tag>
      <abi>x86_64</abi>
    </type-details>
    <revision>
      <major>1</major>
    </revision>
    <display-name>LineageOS x86_64 System Image</display-name>
  </localPackage>
</ns2:repository>
EOF
Confirm that the image is detected:
sdkmanager --sdk_root="${ANDROID_HOME}" --list_installed
The image directory contains files such as:
ls "${ANDROID_HOME}/system-images/android-36/lineage/x86_64"
advancedFeatures.ini  build.prop  data  encryptionkey.img  kernel-ranchu  NOTICE.txt  package.xml  ramdisk.img  source.properties  system.img  vendor.img  VerifiedBootParams.textproto
The Emulator creates the writable user-data image when the virtual device starts; it is not part of the downloaded system-image archive.
Create and start a virtual device
To use Android Studio:
- Open More Actions > Virtual Device Manager from the Welcome screen, or View > Tool Windows > Device Manager from a project.
- Click Create Virtual Device.
- Select a phone hardware profile and click Next.
- Select the LineageOS x86_64 image for API 36 and click Next.
- Name the virtual device and click Finish.
- Launch it from Device Manager.
You can also create the virtual device from a terminal. The echo "no" answer
keeps the default hardware profile instead of opening an interactive prompt:
echo "no" | avdmanager create avd \
  --name eos_a16 \
  --package 'system-images;android-36;lineage;x86_64'
emulator -list-avds
Start the virtual device:
emulator -avd eos_a16 -no-snapshot-load
For a headless cold-boot test:
emulator -avd eos_a16 \
  -no-window -no-audio -no-snapshot -wipe-data \
  -gpu host -feature -Vulkan &
adb wait-for-device
adb shell getprop sys.boot_completed
A completed boot prints 1.
Deleting an existing virtual device
List the virtual device and delete the virtual device named eos_a16
emulator -list-avds
avdmanager delete avd -n eos_a16
Validate whether or not the virtual device has been deleted:
emulator -list-avds
Troubleshoot graphics crashes
If the emulator process crashes in a RenderThread inside SwiftShader or
SwANGLE, or if a headless boot stays stuck before sys.boot_completed=1, first
update Android Emulator. On a host with a supported GPU, retry with hardware
OpenGL and Vulkan disabled:
emulator -avd eos_a16 \
  -gpu host -feature -Vulkan
This combination avoids the software renderer. Hardware rendering depends on
the host GPU and driver; it is a troubleshooting option, not a portable
default. The swiftshader_indirect and guest GPU modes found in older guides
are deprecated.